Peeling and scorching almost always come down to one thing: the wrong heat setting for the fabric you’re working with. Whether it’s denim or nylon, getting that setting right is what separates a patch that lasts for years from one that peels off in a week. Here’s the full process, from Impact Digitizing, on how to use iron-on patches to make your patching perfect.
Why Patches Fail in the First Place
Most patches don’t fail because of a bad patch — they fail because the glue never fully bonds with the fibers underneath. That bond depends on three things working together:
- Sustained Heat: For the glue to melt and penetrate the weave. A quick press for five seconds only heats the top.
- Pressure: You need to push down hard to make the glue stick to the material.
- Equipment: You don’t need a fancy heat press; a regular home iron works well for most clothes when following proper iron-on patch instructions.
What You’ll Need Before You Start
Before you begin these iron-on patch instructions, gather your supplies:
- Household iron: Ensure it is clean. If there are steam holes, make sure the steam option is turned off completely.
- Hard, flat surface: You can use an ironing board, but using a wooden table with a towel on it often works better for putting even pressure.
- Parchment paper: This is your best protection against burning. This will prevent damage to both the patch material and the fabric of the patch.
- Pins or heat-proof tape: Pins will help keep the patch in place so that it does not move when the iron is applied.
- Needle and thread (optional): Very highly suggested for strengthening patches on backpacks and other heavy-duty clothes.
With supplies in place, the actual application comes down to timing more than technique.
Step-by-Step: Applying the Patch
To learn how to iron on a patch with an iron, you need to get ready and pay attention to the time.
- Set the iron: Turn your iron to the highest heat that the fabric can take, but make sure it is on “dry” mode.
- Position: Lay your garment flat. Place the patch where you wish to put it. Spend a little time looking at it from afar since this is your last chance to get it right.
- Cover: Put a parchment paper covering on top of the patch. This prevents the iron from pulling at the embroidery threads.
- The Press: Place the iron down and press firmly for 20–25 seconds. Keep the iron completely still. Do not slide it around like you are ironing a shirt; sliding can pull the patch out of alignment.
- Flip: Turn your garment inside out and apply pressure to the patch side for 20-25 seconds. This step plays an important role in applying patches without ruining the fabric, making sure there is a strong connection.
- Cooling: It is very crucial; wait at least 30 seconds before handling the patch or tugging its edges. When you examine the patch while it’s still warm, the adhesive is still soft and easily removable.
While a commercial heat press heats the patch evenly, an iron works just fine as long as you’re careful. Check out your options at Custom Iron-On Patches: Uses & Personalization.
How the Process Changes by Fabric
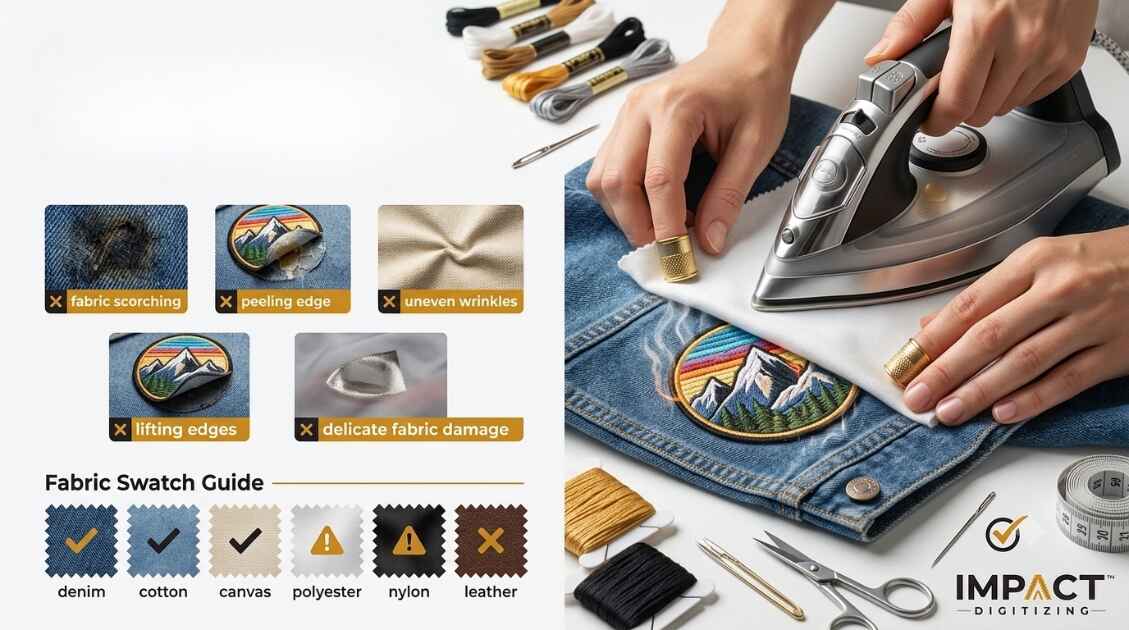
Using iron-on patches on different fabrics means you need to change your technique. Here’s what you need to know in the form of a table:
| Fabric | Iron Setting | Notes |
| Cotton | High, no steam | Very forgiving; holds adhesive well. |
| Denim | High | Thick material; needs a longer press on the back. |
| Polyester | Medium, cloth barrier | Can pucker/melt if the iron is too hot. |
| Nylon | Low-medium, cloth barrier | Very heat-sensitive; test a hidden area first. |
| Leather | Avoid | Heat will ruin the finish; use glue instead. |
Before applying iron-on patches to different fabrics, remember to conduct a test on the fabric by hiding it somewhere secret. For more insights on how to customize your iron-on patches, check out our guide to personalized iron-on patches.
Can You Iron Patches on Leather, Nylon, or Polyester?
Many people wonder whether this method works on different materials, but the answer depends on the fabric type.
- Leather: Do not use an iron, as the heat can make the leather shrivel, crack, and discolor. Use a no-sew patch application with strong fabric glue.
- Nylon: You can do it, but be careful. Many nylon jackets have a thin layer that keeps water out but doesn’t do well with direct heat. When you ask if you can iron patches on leather/nylon/polyester, note that for nylon, you should always use a cloth barrier and keep your settings on low.
- Polyester: Polyester is synthetic. Should you apply too much pressure and heat, this will create a shiny burn that cannot be hidden. You have to use a cloth barrier for sure.
If you are concerned about ruining your clothing, you could always make a no-sew patch application by using good-quality fabric glue. We have many customized patches available that will match your style and logo, just in case you need the perfect patch.
When to Skip the Iron Entirely
There are times when using a no-sew patch application can be more practical. Use these techniques in case your fabric is too fragile for ironing:
- Fabric Glue: Best for use with leather, vinyl, and fragile fabric that can be scorched.
- Stitching: Sewn by hand or by machine for added strength.
- Hybrid Method: First, iron the patch for positioning using the iron-on patch instructions, and then sew some stitches along the edges.
Knowing how to apply a patch using an iron is helpful, but knowing when to refrain from using heat to avoid damaging the fabric is just as essential. For sizing considerations, see Big Patches vs Small Patches.
Common Mistakes That Undo Good Work
Despite having detailed iron-on patch instructions, mistakes can still occur. Some common mistakes that ruin the result include:
- Using steam: Avoid steam because moisture can stop the glue from sticking properly. A dry iron works best when you’re learning how to iron on a patch with an iron.
- Skipping the back: Pressing only one side is not enough. Turn the fabric and press again so the glue settles properly, helping you apply patches without ruining the fabric.
- Moving the iron: Gliding the iron over the patch can make the hot, sticky glue spread or move the patch from its spot. Push straight down.
- Rushing the cool-down: If you try to pull on the corner right away, you might break it before it has set properly. Let it rest.
With a proper technique that will change according to the iron-on patches on different fabrics and the cooling process, you are assured of a professional finish.
Conclusion
A professional and durable connection using iron-on patches can be attained through the right methods. Using dry heat, pressure, and two-sided pressing from Impact Digitizing will help you attain a secure customization of your favorite apparel. Make sure to change the settings for delicate fabrics, let items cool down properly, and sew for extra strength.
FAQs
Can you iron patches on polyester or nylon?
Yes, but use low heat and a cloth barrier to prevent melting.
How long do you iron a patch on?
Press firmly for 20–25 seconds on both the front and the back.
Why isn’t my iron-on patch sticking?
You likely used steam, didn’t press long enough, or failed to press from the back.
Can iron-on patches be removed later?
Yes, by reheating the adhesive with an iron and gently peeling it off.
Do you need to sew iron-on patches too?
It is optional but recommended for heavy-duty items like backpacks to ensure longevity.