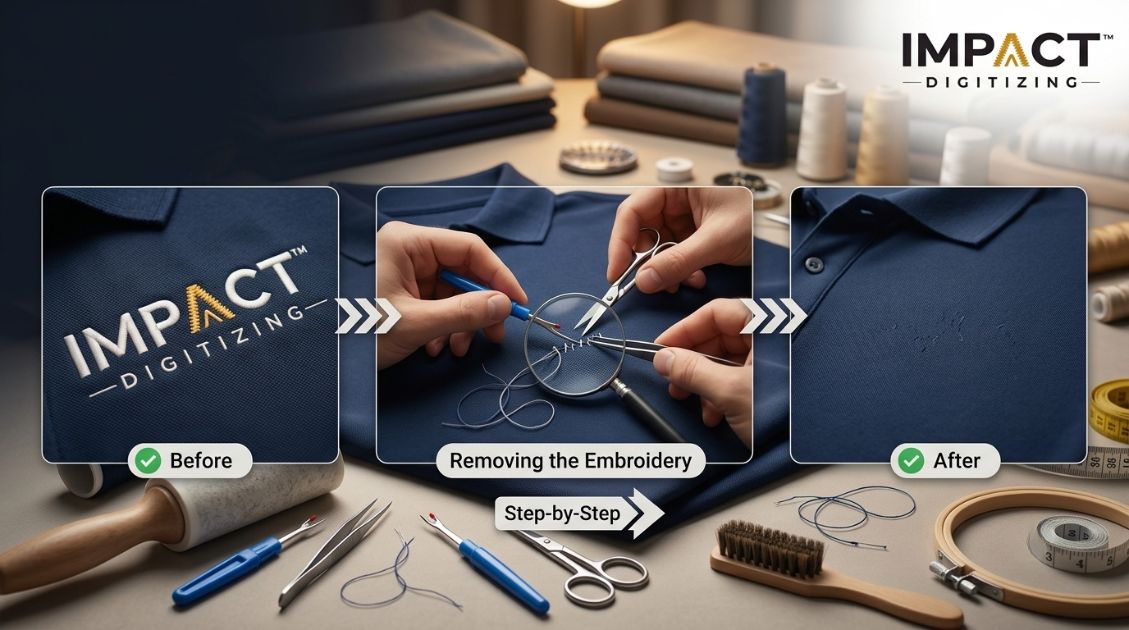
Embroidery removal takes time, proper equipment, and careful work, so as not to damage your fabric. No matter whether you deal with a small design or try to remove an entire logo from your clothes, this procedure requires great attention to detail. Follow this guide to learn how to remove embroidery cleanly and effectively.
Can Embroidery Even Be Removed Cleanly?
The process is usually simple if you exercise patience and care. However, remember that needle holes could be created by embroidery on fragile fabrics. Recognizing the material is the primary step to removing embroidery without damaging the fabric.
- Cotton and Denim: Highly effective for embroidery removal, and comes out perfect.
- Thin Fabrics: Silk or Jersey fabric is delicate and needs to be handled delicately.
- Stiff Materials: Vinyl or leather often leaves permanent holes.
If you are worried about leaving gaps, read our guide on how to Fix Clothing Holes With Machine Embroidery.
Tools You’ll Want Before You Start
Having the right embroidery removal tool is what differentiates a clean fabric from a torn one. Have the following items ready:
| Tool | Purpose |
| Seam ripper | Essential for precise, small-area work. |
| Stitch eraser tool | A specialized electric trimmer for clearing large designs fast. |
| Embroidery scissors | Pointed tips are designed for tight letters and small curves. |
| Tweezers | Necessary for pulling out those tiny, loosened thread bits. |
| Lint roller | Crucial for picking up leftover fuzz once the design is gone. |
With supplies ready, the method you choose really comes down to the size of the design you’re removing.
Method 1: Using a Seam Ripper (Best for Small Areas)
When you need to fix embroidery mistakes or remove monograms, a seam ripper is the standard choice. This is how to take out machine embroidery stitches without haste:
- Flip the garment: Always begin by working from the backside of the embroidery.
- Remove backing: Remove the stabilizer to be able to see the thread ends clearly.
- Cut in small batches: Use your embroidery removal tool to cut only a few stitches at a time.
- Pull with care: Once you get the threads out from the backside, turn the fabric over again and pull the threads out using your tweezers.
- Finish up: Use a lint roller to remove any stray threads left behind.
Method 2: Using a Stitch Eraser Tool (Best for Big Designs)
Using an electric embroidery removal tool for big logos saves significant time. It works like a hair trimmer to cut off threads from the back of the fabric.
- Hoop the area: Ensure that the fabric is tight enough in the hoop so that the device does not snare the garment.
- Use steady pressure: Gently move the device back and forth. This is an efficient way to remove embroidery without damaging fabric.
- Protect the fabric: Always keep your head straight to prevent yourself from cutting the actual garment.
- Limit usage: This method is best suited for bulk work, while manual tools should be used on a case-by-case basis.
Method 3: Using Small Embroidery Scissors (Best for Fonts & Tight Spots)
Regular scissors are often too bulky and increase the risk of accidental cuts. If you want to learn how to take out machine embroidery stitches properly in small spaces, then do the following:
- Target the back: Always snip from the reverse side to protect the visible surface.
- Focus on accuracy: Use the ultra-sharp point of your embroidery removal tool to isolate a single stitch.
- Remove carefully: Pull the snips out with your tweezers to fix embroidery mistakes without unnecessary tugging on the fabric fibers.
Don’t Forget the Backing
Most people focus only on the thread and forget the stabilizer. Removing it improperly is a common cause of damage when you try to remove embroidery without damaging the fabric.
- Peel by hand: Take off as much of the stabilizer as you can by pulling it off with your hands first.
- Softening: If this occurs, soften the back with a warm, damp cloth until it peels off with ease
- Gentle removal: Never pull off stiff backing while dry, as this is a common reason people fail to remove embroidery without damaging fabric.
Common Embroidery Mistakes and How to Fix Them
If you need to fix mistakes in embroidery, finding out the issue first will assist you avoid getting upset.
- Wrong spelling: This usually requires full removal and a total redo.
- Poor placement: You can often just remove embroidery without damaging the fabric in that specific spot, rather than clearing the entire design.
- Puckered fabric: This is usually due to tension; use steam to relax the area after you learn how to take out machine embroidery stitches.
- Loose threads: If the machine caused this, check your settings before restarting; read more on Brother Embroidery Machine Problems.
Will It Leave Holes or Fabric Damage?
Be realistic with your results. High-density designs will likely create little pinpoints that become noticeable when closely examined.
- Manage expectations: There will always be some form of damage done to the fabric if the design is very dense.
- Smoothing: A mild wash or steaming can assist with the fibers becoming relaxed and closing up any holes.
- Alternative fixes: When there are visible holes, an aesthetic patch can look much better than an empty spot, which is a great way to fix embroidery mistakes.
If the damage looks more extensive than expected, it may be worth stepping back and considering whether removal is even the right call.
When It’s Smarter to Just Get It Redone
Sometimes, the labor involved in learning how to take out machine embroidery stitches may cost more than buying a new piece of clothing.
- Evaluate the cost: If you have fabric that is not strong enough, then there are other ways.
- Get Expert Advice: When you have any doubts, contact Impact Digitizing for help with choosing between repair and replacement.
- Cover up: If you need to fix embroidery mistakes fast, a solution might be to place a new design placed directly on top of the old one.
Conclusion
Embroidery removal requires patience and precision so as not to damage your fabric. Choosing the right tools for embroidery removal will depend upon the embroidery design as well as the type of fabric. You should avoid causing damage to your fabric by considering alternative methods of cover-up if need be. For expert assistance with high-quality embroidery designs, visit Impact Digitizing.
FAQs
What tool is best for removing embroidery?
A seam ripper for precision or a stitch eraser for large designs.
Can embroidery be removed without leaving holes?
It depends on fabric type, but minor needle marks may persist.
How do you remove embroidery from leather or hats?
Avoid it, as these materials often suffer permanent puncture damage.
Does removing embroidery ruin the fabric?
It risks damage if you are not careful, especially on thin materials.