A flat PNG logo is different from a logo that has been embroidered on a polo shirt. In the digitalization process, converting a logo into an embroidered one involves making a computer file that will then be used by the computer to embroider the logo. This is how to digitize a logo for embroidery, where the design is converted into a stitch file that guides the machine. This process will help to demonstrate how stitches need to be linked and which colors should be used. Logo experts at Impact Digitizing convert logos into excellent embroidery designs.
What Does It Mean to Digitize a Logo for Embroidery?
Digitizing of the logo is simply meant by the conversion of the image into instructions that the embroidery machine should follow in positioning the needles while creating the stitch pattern. It is impossible to digitize a standard image like JPG and PNG unless you convert the logo to embroidery file instructions that machines can read.
During the digitizing of the embroidery, the most important consideration is:
- The type of stitch that will be made in different areas of the logo.
- Stitch orientation and stitch density.
- Where each thread color should change.
- How the design will interact with different fabrics during the embroidery digitizing process.
Professional digitizers usually work inside advanced embroidery software, where they manually map every element of the design. That is why professional digitizing requires technical know-how as well as embroidery know-how.
The Embroidery Digitizing Process: Step by Step
Knowing about the embroidery digitizing process gives you an idea of how professionals turn logos into files for machines.
1. Prepare the Artwork
Begin with a clear design. The best format would be vector files like AI, EPS, and SVG, but PNG and JPG formats can be used.
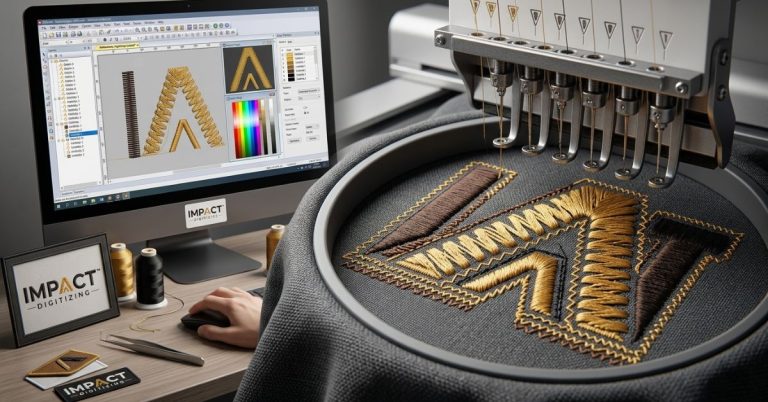
2. Import into Embroidery Software
The logo is loaded into professional embroidery software such as Wilcom, Hatch, or Ink/Stitch.
3. Assign Stitch Types
Each part of the design gets a suitable stitch style. Text, outlines, and fills are handled differently.
4. Set Stitch Direction and Density
Proper density prevents puckering while maintaining clear design details.
5. Add Underlay Stitches
Underlay stitches stabilize the fabric and assist the top stitches to sit cleanly.
6. Map Thread Colors
The design is matched to real embroidery thread shades used on machines.
7. Export the File
The design is saved in the correct embroidery machine format so you can convert the logo to embroidery file types compatible with your machine.
8. Test Stitch-Out
A sample run ensures the design stitches cleanly before production.
For a professional, fast solution, see Impact Digitizing’s logo digitizing services for accurate stitch paths and machine-ready files.
Embroidery File Formats Explained
Various embroidery machines utilize different embroidery file formats. Selecting the correct one is crucial when you convert a logo to embroidery file types.
| Format | Machine/Software | Best For |
| DST | Tajima (commercial) | Industry standard most widely accepted |
| PES | Brother | Small business & home machines |
| JEF | Janome | Home embroidery users |
| EXP | Melco / Bernina | Professional embroidery shops |
| EMB | Wilcom | Editable source file (not for machines) |
Before ordering digitizing services, always confirm which format your embroidery machine supports.
Common Stitch Types Used in Digitizing
Choosing the correct stitch type is one of the most vital parts of the embroidery digitizing process.
- Running Stitch: Used for outlines and small details. It uses minimal thread and works well for thin lines.
- Satin Stitch: Common for text and borders. It makes a smooth, glossy finish.
- Fill Stitch: Utilized for large areas or backgrounds. It adds durability and texture.
When choosing an incorrect stitch style, you can end up breaking threads, making uneven stitches, or distorting your logo.
DIY vs Professional Logo Digitizing
One of the methods used by people to digitize their logos is using free embroidery software. Although it is possible, many times professional results depend on experience when trying to convert logos to embroidery file designs accurately.
DIY digitizing often involves:
- Long learning curves.
- Trial-and-error stitch testing.
- Limited software features.
Professional digitizing services provide:
- Clean stitch paths.
- Correct density and compensation.
- Proper embroidery file formats for any machine.
When embroidering your company’s branding clothes, professional digitization will help you save time and money in case of any production errors.
Common Digitizing Mistakes to Avoid
Any small mistakes during embroidery digitizing can change the outcome.
- Low-quality imagery: Blurry imagery would lead to inaccurate stitching.
- Unsuitable stitch density: Over-stitching would cause puckering and thread breakages.
- Ignoring fabric type: Inconsistency in digitizing for particular kinds of fabrics.
- Skipping test runs: A test stitch-out reveals problems before full production.
Conclusions
Understanding how to make your logo ready for embroidery needs practice, knowledge, and the right software. It entails creating the sewing plan, identifying the threads to be used, and saving the appropriate files using compatible embroidery file formats. To make the best embroidery design for clothes, firms utilize the expertise of Impact Digitizing.
Trust Impact Digitizing for professional logo digitizing, perfect stitch paths, and dependable turnaround times.
FAQs
1. How do you digitize a logo for embroidery?
Convert artwork into stitch instructions utilizing embroidery digitizing software.
2. What is the best embroidery digitizing software for beginners?
Wilcom Hatch, Ink/Stitch, and Embrilliance are famous beginner embroidery digitizing tools.
3. Can AI do embroidery digitizing?
AI can assist with digitizing, but manual editing ensures accurate embroidery stitching.
4. How to convert an image to embroidery data?
Import image into digitizing software, assign stitches, adjust density, export machine file.
5. Is embroidery digitizing hard?
It requires practice, software skills, and embroidery knowledge for professional results.