
Embroidering caps can be tricky, but with the right techniques, you can achieve professional results. Whether you’re working with structured or unstructured caps, understanding how to use a cap embroidery machine properly is key. Here in this article, we’ll share 10 essential tips to help you get the best embroidery results on caps.
What is an Embroidery Machine Used For?
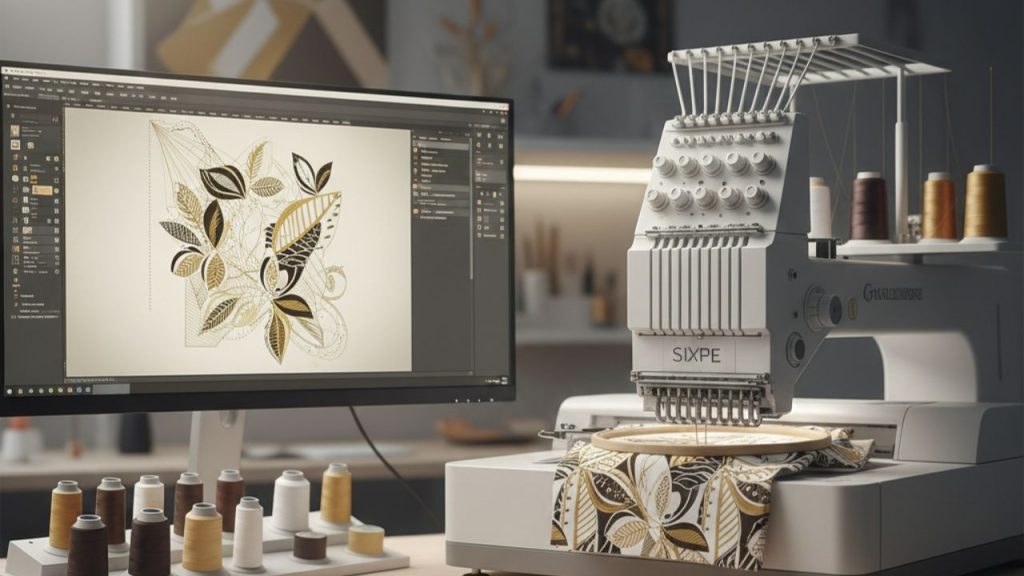
An embroidery machine is used to stitch designs, logos, and patterns onto fabric automatically. It is commonly used for customizing caps, shirts, jackets, and other textiles with detailed embroidery. These machines work with digital designs, providing precision and consistency in every stitch.
Brands like Impact Digitizing offer high-quality embroidery digitizing services, making it easier to create detailed and professional designs. With the right digitized files, embroidery machines can produce sharp, well-defined patterns that enhance the look of any fabric. Learn more here.
1. Use a cap-specific hoop
Using a cap-specific hoop has to do with the fabric staying in place while being embroidered. Regular hoops may not hold the curved surface of a cap properly, leading to misaligned stitches or wrinkles. A cap hoop provides better stability and grip, preventing movement during the embroidery process.
This tool is especially useful when working with structured caps or designs with fine details. It keeps the cap firm and stretched correctly, allowing for clean and precise embroidery. If you want professional-looking results, investing in a cap-specific hoop is a smart choice.
2. Choose the right stabilizer
A stabilizer plays a crucial role in keeping the fabric firm and preventing distortion while embroidering. For caps, a tear-away stabilizer is commonly used because it provides enough support without making the cap feel stiff. However, if the cap fabric is soft or stretchy, a cut-away stabilizer may work better for long-lasting results.
The right stabilizer helps maintain design accuracy, especially when dealing with complex embroidery. Without proper stabilization, the stitches can shift, causing uneven results. Choosing the right type guarantees that the embroidery remains neat and durable.
3. Adjust machine speed
Slowing down the embroidery machine speed can lead to better accuracy and cleaner stitching. Caps have a curved surface, and if the machine runs too fast, the needle might skip or cause puckering. Adjusting the speed allows the machine to handle the fabric more smoothly.
A lower speed is particularly important for detailed designs or thick caps. While it might take a little longer to complete, the quality of the embroidery improves significantly. Finding the right balance between speed and precision has a flawless finish.
4. Use the correct needle
Choosing the right needle prevents thread breaks and skipped stitches. For cap embroidery, a sharp-point or ballpoint needle is often recommended, depending on the fabric. A sharp-point needle works well for tightly woven caps, while a ballpoint needle is better for softer materials.
The size of the needle also matters. A thicker needle, like a size 75/11 or 80/12, is ideal for stitching through structured caps. Using the wrong needle can cause fabric damage or uneven stitching, so selecting the correct one easier and smoother embroidery.
5. Check thread tension
Proper thread tension is key to achieving clean and balanced embroidery. If the tension is too tight, the thread may break frequently or cause the design to look distorted. If it’s too loose, the stitches can appear uneven or have gaps.
Regularly checking and adjusting the tension has to do with the design being stitched smoothly. Test stitching on a sample fabric before starting the final embroidery can help in setting the correct tension. This step reduces errors and improves the overall quality of the design.
6. Mark the center of the cap
Marking the center of the cap helps has that the embroidery is placed correctly. Caps have a curved surface, making it easy for designs to shift off-center if not aligned properly. A simple chalk or washable fabric marker can be used to draw a guideline before starting.
Taking the time to mark the center prevents mistakes and saves time on adjustments later. This step is especially important for logos or text-based designs that need precise positioning. A well-centered design gives the cap a professional and polished look.
7. Pre-curve the cap
Since most caps have a natural curve, pre-curving them before embroidery helps prevent fabric distortion. This step allows the material to sit more naturally in the hoop, reducing the chances of wrinkles or stretching during stitching.
Pre-curving also helps the design follow the cap’s shape more smoothly. It provides that once the cap is worn, the embroidery remains aligned and doesn’t appear skewed. This small preparation step can make a big difference in the final results.
8. Test the design first
Before stitching directly onto the cap, running a test design on a similar fabric is a good practice. This allows you to check for any issues with thread tension, stitch quality, or design alignment before committing to the final embroidery.
A test run helps catch any errors early, saving time and materials. Adjustments can be made to improve the design before embroidering on the actual cap. This step is especially important for detailed or multi-color embroidery.
9. Use high-quality thread
The type of thread used in embroidery affects both durability and appearance. High-quality polyester or rayon threads work best for caps as they are strong and resistant to fading. Cheap threads can break easily, causing interruptions during stitching.
Good-quality thread also helps achieve smoother and more vibrant embroidery. It provides a professional finish, making the design last longer even after multiple washes. Investing in strong, colorfast thread provides better results.
10. Keep the cap flat
Keeping the cap as flat as possible during embroidery helps maintain accuracy. If the fabric bunches up or shifts, the stitches may become uneven or misaligned. Using clips or an extra stabilizer can help keep the cap in place.
A flat surface allows the machine to stitch smoothly, reducing the risk of gaps or distortions in the design. Securing the cap stays steady throughout the process leads to cleaner, more precise embroidery.
Conclusion
Cap embroidery requires precision and the right techniques to achieve clean and professional results. By using the correct stabilizers, needles, and tension settings, you can avoid common mistakes and assure smooth stitching. Follow these 10 expert tips to make your cap embroidery projects easier and more successful!
FAQs
1. What type of stabilizer should I use for cap embroidery?
A: Tear-away stabilizer is commonly used for caps because it provides support during stitching but can be easily removed afterwards. Some designs may require cut-away stabilizers for extra durability.
2. Why is my cap moving during embroidery?
A: Cap movement usually happens if the hoop isn’t tight enough or if the cap isn’t positioned correctly. Make sure to use a cap-specific hoop and properly align the cap to keep it stable.
3. What needle size is best for cap embroidery?
A: 75/11 or 80/12 sharp-point needle works well for most cap embroidery. For thick materials like leather or heavy canvas caps, you may need better 90/14 needle penetration.
4. How do I prevent thread breaks when embroidering caps?
A: Thread breaks can happen due to high tension, dull needles, or incorrect bobbin settings. Lowering the tension slightly, using a fresh needle, and checking bobbin tension can help reduce thread breaks.